Note: In a previous blog post, we wrote some code that enables us to generically define modules that we'll be building on top of in this post. The source code can be found here.
In that prior post, we looked at how to get started with the Tuist Xcode project generator and how you could use it to create a module structure for your iOS projects. In this article we'll take the simple module system we built, and learn how to extract it into a Tuist plugin which can be reused across projects. This can be super helpful to share extended Tuist functionality across your organization, or even to share with the wider world as an open-source project.
Tuist plugins
Plugins in Tuist are used to add new functionality to suit your project. There are a few core kinds of plugins that can be built:
- Project description helpers. These are extensions to Tuist’s <code>ProjectDescription<code> offerings. We’ll be making use of this type of a plugin to build out our module system.
- Templates. Tuist has a handy <code>scaffold<code> command which can ease the burden of adding boilerplate to your project. In our case, we could make a scaffold plugin which adds a new module to a project.
- Task. Task plugins actually add functionality to Tuist using the ProjectAutomation framework. An example of a task plugin is the SwiftLint runner built out by the Tuist team.
- ResourceSynthesizer. By default, Tuist can create accessors in code for things like assets, strings, fonts, and files contained in your main bundle or the resource bundle of one of your targets. The ResourceSynthesizer plugin is a customization point for you to add your own kinds of generated accessors.
This is but an overview of the available kinds of plugins in Tuist. Be sure to dig into the docs for the ones you’re interested in to get the details on how to build them out.
In this post, we’ll be making a Project description helper plugin.
Creating a project description helper plugin
As noted above, we previously wrote some code that enables us to generically define modules (the source code can be found here). First, we can make it more reusable by extracting it to a local plugin. From there, it becomes easier to publish the plugin via git source control so it can be available more broadly.
The first step is to put a new directory at the root of our repository called <code>ModuleDefinition<code>. Inside that we'll put two things: a <code>Plugin.swift<code> file and a folder called <code>PackageDescriptionHelpers<code>. It's important to note that each plugin type has its own structural requirements. For custom project description helpers, we only need those two things. So now our repo looks like this:
You may notice a similarity between the Tuist directory and our plugin's directory: they both contain the <code>ProjectDescriptionHelpers<code> folder where our extra code will go. Before we get there, let's look at the straightforward code of <code>Plugin.swift<code>.
All we have to do here is define the plugin by name. Tuist will compile the plugin with the given name, and in our helpers we can then use `import ModuleDescription` to access the plugin's code. Tuist will look in the neighboring `ProjectDescriptionHelpers` directory for the code which will make up the plugin.
Now in our project's <code>Tuist/Config.swift<code> file we can import the plugin like so:
Here, we declare that the plugin we are looking for is two levels above the manifest (the repo's root) and in the <code>ModuleDescription<code> directory.
We'll then move all the files that make up the module description code over to the <code>ModuleDescription/ProjectDescriptionHelpers<code> directory (that code was previously in its own directory and easy to move over). Let's then run <code>tuist edit<code> so we can edit the Swift code that makes up the project.
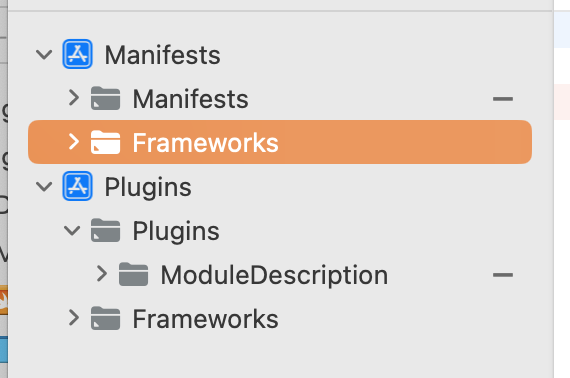
One thing that's easy to overlook in the resulting Xcode project is that you're working in an Xcode workspace with 2 projects: Manifests and Plugins. Let's look at the Plugins project first, as the Manifests project will depend on the Plugins project.
First thing to do is try to build the Plugins project and fix any build failures. Once that target is building, we can flip over to the Manifests project and try to build the Manifests target. There will be build failures here as we've moved a sizable chunk of code over to our new plugin. In our case, where we declare our modules we'll need to use <code>import ModuleDescription<code> in order to use it, just like any other framework or package that we would use in our iOS projects.
You may find other build failures with things like not using proper access control. It's important to think about how your plugin is accessed, just like you would with any other framework. It has an API that you control, and things are exposed from the plugin via <code>public<code> types, methods, and functions. It's important to consider what a good API for your plugin looks like. In our example, you’ll find that we had to create some public initializers for struct types which were previously provided by the generated <code>internal<code> initializers from the Swift compiler.
One other thing to think about for your plugin's API is if it needs any kind of configuration. In our case, we need to inject the bundle identifier of the base app for things like resource bundles and extensions that we’ll need to build in this customization. To handle this requirement, we can add a new <code>PluginConfiguration<code> class with a static member on it for the bundle identifier. And with the entry point to the plugin being project creation, that's the logical place to have the identifier injected:
It's important to note that we can’t set the bundle ID in Project.swift because expressions are not allowed in that file — you'll get an error if you try to set it directly.
Now that we've sorted out our build failures in the Manifests project, everything should build correctly. Congratulations — we've made a local Tuist plugin! Now, the next step is to make this plugin remote in git so that we can share it out to the rest of our team and beyond.
Taking our plugin remote
There are multiple advantages to moving custom plugins to a remote repository. Not only can we distribute them far and wide, but we can leverage Swift Package Manager to write tests and build different versions of our plugin. The local plugin's structure is not a typical Swift package style, so we'll need to make some modifications to the manifest to get things working correctly. Start off by creating a bare repository and running the command to create a package with a library product:
This generates a boilerplate Swift package for us with the following structure:
Tuist does not use Swift Package Manager to do its resolution, so it needs the <code>Plugin.swift<code> and <code>ProjectDescriptionHelpers<code> of the plugin to be at the top level. As such, go ahead and delete the <code>Sources<code> and <code>Tests<code> directories of the package. The only part of the initial package scaffolding we need is the <code>Package.swift<code> manifest. We'll then copy over our local plugin’s contents to the new repo and add a <code>Tests<code> directory so our new structure looks like this:
This is unlike most Swift packages in that we are foregoing the standard directory structure. The reason is that our primary client is going to be Tuist via a <code>git clone<code>, and the package will give us affordances like ensuring that the code builds and letting us write and run tests. To get things running, we then need to overhaul the Package.swift file:
- In the top section you can call the package whatever you want, since this is not being distributed as a package or depended on as a package. The important name is what is in the Plugin file, as that's how clients will <code>import<code> your plugin.
- Because our plugin is extending <code>ProjectDescriptionHelpers<code> (which is provided by Tuist when we run <code>tuist build<code> or <code>tuist edit<code>), we will still need those. As a helpful convenience the Tuist project has a package of just <code>ProjectDescription<code> which we can use as a dependency. It's much smaller than depending on all of Tuist.
- An interesting feature of SPM is the ability to set custom paths. This lets us preserve the top level <code>ProjectDescriptionHelpers<code> directory (and add one for <code>Tests<code> while we are at it) so Swift Package Manager can resolve everything, while keeping the directory structure we require.
You can now open the package in Xcode and build it, write some tests, and run those tests. Everything should work as expected. Push this repo up to your remote on GitHub, GitLab, Bitbucket, or other git host.
The last thing to do is update the client project to point at the remote plugin:
We've changed the plugin location from <code>.local<code> with a path, to <code>.git<code> with a URL. You may be used to declaring a dependency’s version as being “up-to next major” or pinned to an exact version. Tuist’s plugin dependency system is not as capable as SPM’s, so we need to point to either a git tag or a commit hash (in git parlance, a tag is a fancy way of labeling a commit).
A word of warning: it will be far easier to reference plugins in your Config file by their SHA (either the full hash or the first 7 characters as that guarantees uniqueness). When tag-based plugins are requested, Tuist assembles a special URL to request the plugin — and it doesn’t always get the download URL quite right. Specifying SHAs directly tends to be much more reliable.
Once this is in place then we can delete the local plugin content and try building again. Everything should still work as we'd expect! 🪄
Plugin and play
We've covered a lot of ground here. We extracted the code from our local Tuist <code>ProjectDescriptionHelpers<code> that define our module system, made it a local plugin, and then uploaded that plugin to git where we can share it with our other projects and other users all over the world. Now you can go forth to build and distribute Tuist plugins for all your project generation needs, helping you build apps more consistently, with less fuss.


